
VMware vRA 8 has completely new architecture, before deployment of VMware vRA 8 lets understand first what are the components needed for VMware vRA 8 and what is the role of these components.
Components of VMware vRA 8


vRealize Lifecycle Manager (vRLCM)
vRLCM Offers single installation and management platform for various VMware vRealize Products

vRealize Identity Manager
VIDM Offers Application Provisioning, Conditional Access Control and SSO.
vRealize Automation
vRA Offers secure self service portal, this portal IT as a Service. Through this portal one can automate the delivery of Virtual Machines, Cloud Machines, Applications and Personalized IT services.
 Cloud Assembly
Cloud Assembly is used to create and deploy machines, application and services to multiple clouds.
Service Broker
Service Broker aggregates content in native formats from multiple clouds and platforms into a common catalog for easy consumption on VMware Cloud.
Code Stream
Code Stream is a continuous integration and continuous delivery (CICD) software that enables you to deliver software rapidly and reliably, with little overhead.
VMware vRA 8 Port Communication Diagram
vRA 8 Standard Installation Procedure
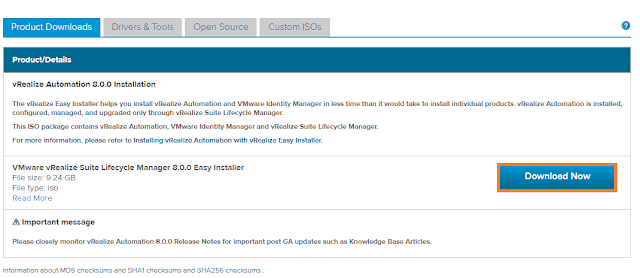
1. Download Easy Installer ISO from here https://my.vmware.com/web/vmware/details?downloadGroup=VRA-800&productId=938&rPId=38310
2. Mount this ISO in your System from where you want to perform Remote Installation of vRA 8 Components > Once Mounted Drive where ISO is Mounted > vrlcm-ui-installer > Win32 (As my machine where ISO was mounted is running Windows OS, if it MAC OS or Linux OS access folders accordingly instead of Win32).

3. Click on Install Tile

4. Click Next on Introduction Page

5. Accept EULA > Click on Next > Accept Security Warning

6. Enter the Details of vCenter Server at Appliance Deployment Target Page > Click on Next


7. Select VM and Templates Location to keep VMs Deployed for vRA by Easy Installer > Click on Next

8. Select Cluster to Provide the resources New VMs Deployed for vRA 8 > Click on Next

9. Select Datastore to keep the vRA VMs Files > Click on Next

10. Configure Network Settings for vRA, vIDM and vRLCM > Click on Next

11. Configure Password for vRA, vIDM and vRLCM users > Click on Next

12. Specify vRLM Configuration > Click on Next

13. Specify vIDM Configuration > Click on Next

14. Specify vRA Configuration Details > Click on Next

15. Review Summary > Click on Next

16. It will take Few Minutes (Approx 90 Minutes for Standard Installation [Subject to Vary in different environments]) to complete the Installation. Once Completed You can start accessing your vRA environment.

Components of VMware vRA 8


vRealize Lifecycle Manager (vRLCM)
vRLCM Offers single installation and management platform for various VMware vRealize Products

vRealize Identity Manager
VIDM Offers Application Provisioning, Conditional Access Control and SSO.
vRealize Automation
vRA Offers secure self service portal, this portal IT as a Service. Through this portal one can automate the delivery of Virtual Machines, Cloud Machines, Applications and Personalized IT services.

Cloud Assembly is used to create and deploy machines, application and services to multiple clouds.
Service Broker
Service Broker aggregates content in native formats from multiple clouds and platforms into a common catalog for easy consumption on VMware Cloud.
Code Stream
Code Stream is a continuous integration and continuous delivery (CICD) software that enables you to deliver software rapidly and reliably, with little overhead.
VMware vRA 8 Port Communication Diagram
 |
| Image Credit: VMware Documentation |
vRA 8 Standard Installation Procedure
1. Download Easy Installer ISO from here https://my.vmware.com/web/vmware/details?downloadGroup=VRA-800&productId=938&rPId=38310

2. Mount this ISO in your System from where you want to perform Remote Installation of vRA 8 Components > Once Mounted Drive where ISO is Mounted > vrlcm-ui-installer > Win32 (As my machine where ISO was mounted is running Windows OS, if it MAC OS or Linux OS access folders accordingly instead of Win32).

3. Click on Install Tile

4. Click Next on Introduction Page

5. Accept EULA > Click on Next > Accept Security Warning

6. Enter the Details of vCenter Server at Appliance Deployment Target Page > Click on Next


7. Select VM and Templates Location to keep VMs Deployed for vRA by Easy Installer > Click on Next

8. Select Cluster to Provide the resources New VMs Deployed for vRA 8 > Click on Next

9. Select Datastore to keep the vRA VMs Files > Click on Next

10. Configure Network Settings for vRA, vIDM and vRLCM > Click on Next

11. Configure Password for vRA, vIDM and vRLCM users > Click on Next

12. Specify vRLM Configuration > Click on Next

13. Specify vIDM Configuration > Click on Next

14. Specify vRA Configuration Details > Click on Next

15. Review Summary > Click on Next

16. It will take Few Minutes (Approx 90 Minutes for Standard Installation [Subject to Vary in different environments]) to complete the Installation. Once Completed You can start accessing your vRA environment.


