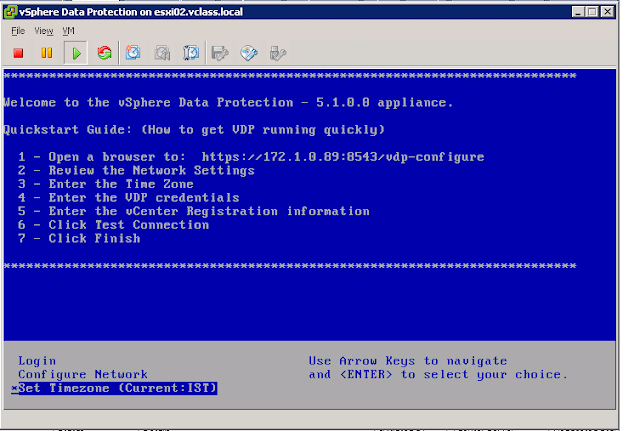
1. Deploy vSphere Data Protection Appliance and Connect with the vSphere Data Protection Appliance Console

2. Access the VDP configuration wizard by using https://<vSphere Data Protection IP>:8543/vdp-configure. By default the root user password is changeme
3. On welcome screen click on Next
4. Review the network settings and if you want to change these settings you can change these settings also. Configure vSphere Data Protection Appliance Hostname and Domain Name.
Note:- The Name that you want to use as the Hostname must be registered in the DNS.
5. Select Timezone and Click on Next
6. Change the VDP Password and Click on Next
7. Register your VDP with vCenter Server for that specify the vCenter Credentials and vCenter Name and SSO Hostname and Click on Test Connection and Click on Next
8. Click on Finish
9. Again Access the VDP configuration wizard by using https://<vSphere Data Protection IP>:8543/vdp-configure. Now you can start and stop the vdp services from here
10. If you want to change the IP address and Other Information related to VDP you can change it from here
11. To Rollback Click on the Rollback Tab
12. Open the Upgrade Tab to Upgrade the Appliance
13. Connect with Your vSphere Web Client :- https://<vSphere Web Client IP/Name>:9443/vSphere-Client and Login Here
14. Click on vSphere Data Protection
15. Connect with VDP Server
16. Now you are at the Getting Started Tab.
17. To Create a New Backup Job. Click on the New from the Backup Tab
18. Select the VM that you want to backed up and Click on Next.
19. Select the Backup Schedule. Click on Next
20. Configure the Retention Policy. Click on Next
21. Specify the Name for the Backup Job. Click on Next.
22. Once Done. Click on Finish.
23. Now Backup Job is created Successfully
24. To Start the Backup Job Now. Click on Backup Now
25. You will get this Message. Click on OK.
26. It's in Progess.
27. To Restore the VM from the Backup. Open the Restore Tab and Click on the Restore
28. Select the VM that you want to restore and Select the Restore Point. Click on Next
29. Choose the Restore Location. Click on Next
30. Click on Finish
31. Click on Ok.
32. Restoration is in Progress.
33. Check the Backup is Successful or Not From the Reports Tab.
34. Check the VDP configuration From Configuration Tab.
35. To Perform the File Level Restore (FLR) of a Particular VM. Open the VM Console and Specify the OS Local User Credential and Even you can use advance Login also to perform the FLR from any VM.
36. To use Advanced Login. Provide the OS local user credentials and as well as the vCenter Server User Credentials
37. I Selected Basic Login
38. Select Backup From where you want to perform FLR. and click on Mount.
39. Select File or Folder whatever you want to restore and Click on Restore.
40. To start the Restore. Click on yes.
41. Click on Ok.
42. To Check the Completed Jobs from Monitor Restores.
Enjoy!!!!!


No comments:
Post a Comment